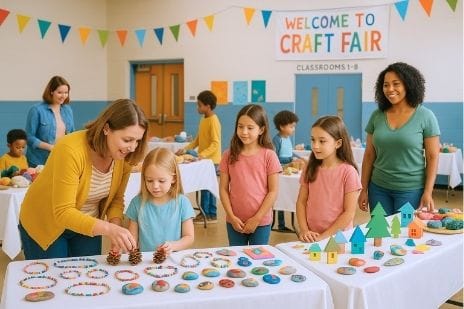
A community craft fair is one of the most fun, collaborative events a PTA or PTO can host. It brings families together, showcases local talent, supports small businesses, and helps raise money for your school—all while building a strong sense of community. Craft fairs work well at schools of every size because they’re flexible, beginner-friendly, and easy to scale based on your volunteer capacity.
Whether you’re starting from scratch or improving an annual tradition, this guide walks you through exactly how to organize a successful community craft fair at your school.
Table of Contents
Why Host a Community Craft Fair at School?
Craft fairs are popular because they offer benefits for the entire school community:
- Fundraising opportunities through booth fees, raffles, concessions, or donation tables
- Support for local crafters and artisans, especially parents or staff
- Family-friendly atmosphere that boosts school culture
- A chance for students to showcase creativity through art, crafts, or mini-shops
- Low-cost event setup with high potential turnout
- Flexibility—indoor, outdoor, or hybrid
Parents love events that feel local and meaningful, and a craft fair checks every box.
Step-by-Step: How to Organize a School Community Craft Fair
1. Define Your Event Goals and Format
Before booking crafters or designing sign-up forms, decide what type of craft fair you want to host.
Questions to consider:
- Is this a fundraiser, community event, or vendor showcase?
- Will vendors pay a booth fee?
- Will your school sell concessions, raffle baskets, or spirit wear?
- Should students participate with their own craft booths?
- Will the fair be indoor, outdoor, or both?
Clear goals help you budget, plan staffing, and communicate expectations.
2. Choose a Date, Time, and Location
Craft fairs work best during:
- Late fall (holiday shopping)
- Early spring
- Weekends or weeknights when families are available
Ideal locations:
- Multipurpose room
- Gym
- Courtyard
- Hallways
- Cafeteria
Make sure the space has:
- Electrical access for vendors
- Restrooms
- Parking
- Accessible pathways
The earlier you confirm your location with school administration, the easier the rest of your planning becomes.
3. Recruit a Craft Fair Committee
Running a community craft fair is smoothest when you divide responsibilities.
Suggested roles:
- Vendor coordinator
- Marketing & communication lead
- Volunteer coordinator
- Decorations & setup lead
- Treasurer (to handle payments)
- Student booths coordinator (optional)
This reduces burnout and helps each volunteer focus on a manageable area.
Click the image below to purchase this flyer template on Etsy.
4. Set Vendor Guidelines and Booth Fees
Decide:
- How many vendor spaces you will offer
- The cost per booth (popular rates are $25–$75, depending on table size and expected turnout)
- Whether student booths are free
- What vendors must bring (tables, chairs, display items)
- What the PTA/PTO will supply (electricity, Wi-Fi, chairs, signage)
- If duplicate product types are allowed (e.g., only one candle vendor)
- Whether you’re prioritizing local or school-community vendors
Write guidelines clearly to avoid misunderstandings later.
5. Create Vendor Applications and Collect Payments
Use simple digital forms (Google Forms, Jotform, Cheddar Up) to collect:
- Contact information
- Business name
- Product descriptions
- Social media or website links
- Photos of their work
- Special space/electrical needs
For payments, offer options:
- Online payments
- Checks
- School district-approved systems
Pro tip: Approve vendors on a rolling basis and maintain a waitlist once full.
6. Plan the Craft Fair Layout
A well-planned layout makes or breaks your event.
Include:
- Vendor booth map
- Traffic flow path
- Entrances and exits
- Student booth area (if included)
- Raffle or silent auction tables
- Concessions
- Seating for families
- Information booth
If outdoors, plan for:
- Weather
- Shade tents
- Power access
- Emergency pathways
Use painter’s tape or chalk to mark booth spaces during setup.
7. Recruit Volunteers
Volunteers can help with:
- Set-up and clean-up
- Vendor check-in
- Running the concession stand
- Managing raffle baskets
- Helping student vendors
- Working the welcome table
- Overseeing parking or crowd flow
Post sign-up links early and often. Micro-volunteer roles (30-minute shifts) increase participation dramatically.
8. Market the Event to Families and the Community
Use multiple communication channels:
- School newsletters
- PTA/PTO email lists
- Flyers sent home
- Social media event pages
- Local community groups
- District event calendars
- Posters around town
- Content spotlighting featured vendors
Marketing tip: Vendors are your biggest promoters—give them shareable graphics.
9. Add Fun Extras to Boost Engagement
A community craft fair becomes more memorable when it includes small, family-friendly touches:
- Live music from the school band or choir
- Photo booth
- Hot cocoa or snack cart
- Kids’ craft station
- Student demonstrations (art, pottery, robotics)
- Raffle baskets
- Silent auction
- Gift-wrapping station
These elements increase foot traffic and improve overall experience.
10. Day-of Logistics and Smooth Operations
To make event day stress-free, prepare:
- A printed vendor list
- Booth map copies for check-in
- Name tags or booth signage
- Cash box (if selling concessions or raffle tickets)
- Extra extension cords
- Trash and recycling bins
- Volunteer badges
- A central information table
Have volunteers ready to:
- Greet vendors
- Answer questions
- Provide breaks for solo vendors
- Monitor restrooms and common areas
- Handle safety and emergency needs
A calm, visible PTA presence keeps everything running smoothly.
11. Collect Feedback and Debrief
After the craft fair:
- Send vendors a short feedback form
- Ask volunteers what worked well
- Document challenges
- Note which booth types were most popular
- Review overall fundraising totals
- Record recommendations for next year
Add all debrief documents to your PTA binder so future planners have everything they need.
12. Celebrate Your Community’s Success
Finish strong by sharing appreciation:
- Thank vendors on social media
- Highlight student booths
- Share photos
- Thank volunteers and staff
- Post fundraising totals if relevant
Public recognition strengthens relationships and encourages continued participation.
FAQ: Organizing a Community Craft Fair at School
How far in advance should we plan the craft fair?
Most PTAs start planning 2–4 months ahead, depending on event size.
How do we find vendors?
Start with school parents, then post applications publicly in local groups and maker communities.
How many vendors should we allow?
It depends on your space. Most schools host 20–60 vendors.
Do we need insurance or district approval?
Many districts require facility permits and insurance for vendors. Check policies early.
What should booth fees cover?
They should cover event costs (custodial fees, supplies) and ideally raise funds for your PTA/PTO.
Other fun PTA events:
Popsicles on the Playground (Easy Back-to-School or End-of-Year Event)
Muffins with Mom (Simple Morning Event Guide)
Everything You Need to Host a Family Dance (Glow, Disco, Neon, etc.)
How to Run a School Movie Night (Easy, Family-Friendly Event Guide for PTA/PTO Volunteers)

Leave a Reply
You must be logged in to post a comment.